In product rendering, using an HDRI map for object reflections while needing a solid color background to align with color guidelines can be a common requirement. Today, we'll explore how to leverage the benefits of your HDRI map while achieving a specific background color. We'll illustrate this using our recent render for the Minutes Network project.
Step 1: Initial Setup
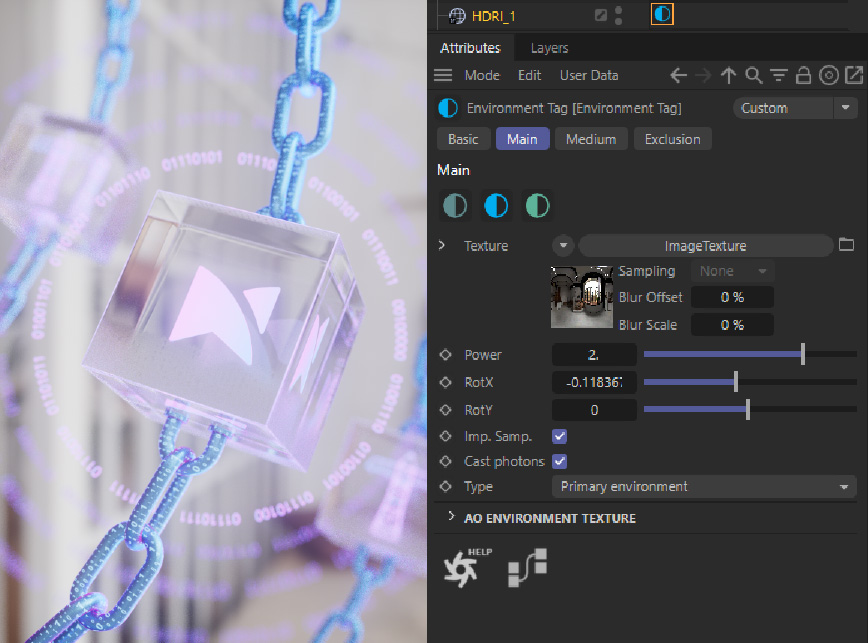
Our scene is already set with an HDRI map, which by default, is set to the Primary Environment type.

Step 2: Creating a Custom HDRI Map & Switching HDRI Type
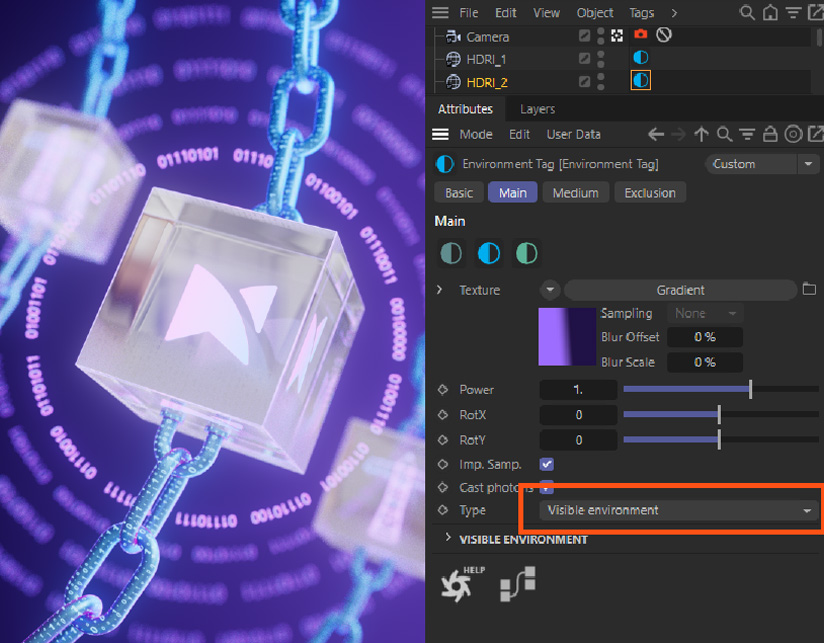
Instead of adding a traditional backdrop, which blocks light and necessitates additional lighting, we opt for a new HDRI map. This approach allows light to pass through, maintaining the existing lighting setup. After adding the new HDRI, ensure it has the correct color or gradient in the texture field. In our case, it’s a gradient.
Once the new HDRI is ready, change its type to Visible Environment. This swap allows for the new background to appear, but the original reflections inside the glass cube might persist from the previous HDRI.

Finalization: Adjusting for Glass Cube Reflections
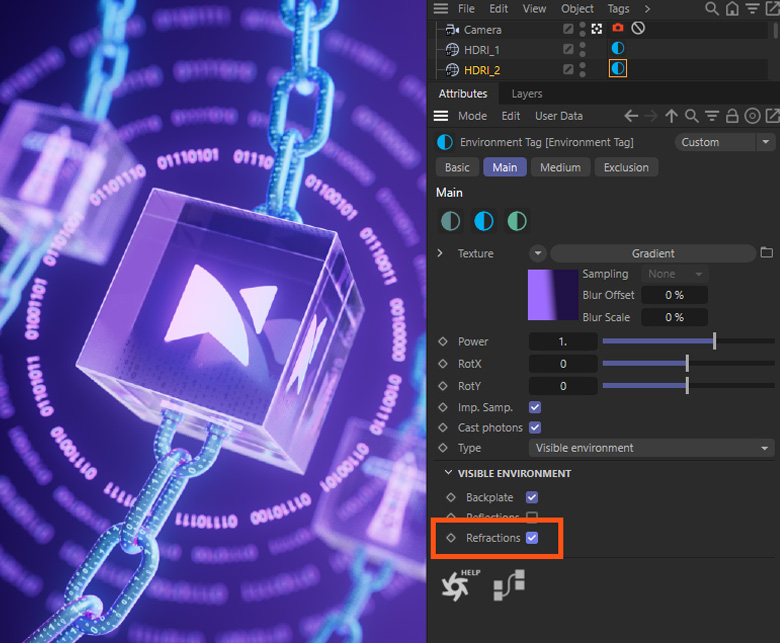
To address reflections, access the “Visible Environment” dropdown menu and activate the option for “Refractions.” This adjustment ensures that the reflections within the glass cube now align with the new HDRI setting.

With these steps, the reflections from the first HDRI are retained, but they no longer appear on the background or inside the glass cube, effectively resolving the issue
Further Reading:
For those keen on expanding their digital portfolio, don't miss our recent article, "Complete Behance Portfolio and Profile Dimensions Sizing Guide". This guide is an invaluable resource for artists and designers looking to showcase their work on Behance with perfect dimensions and layout. Enhance your online presence with our expert tips and tricks.


